
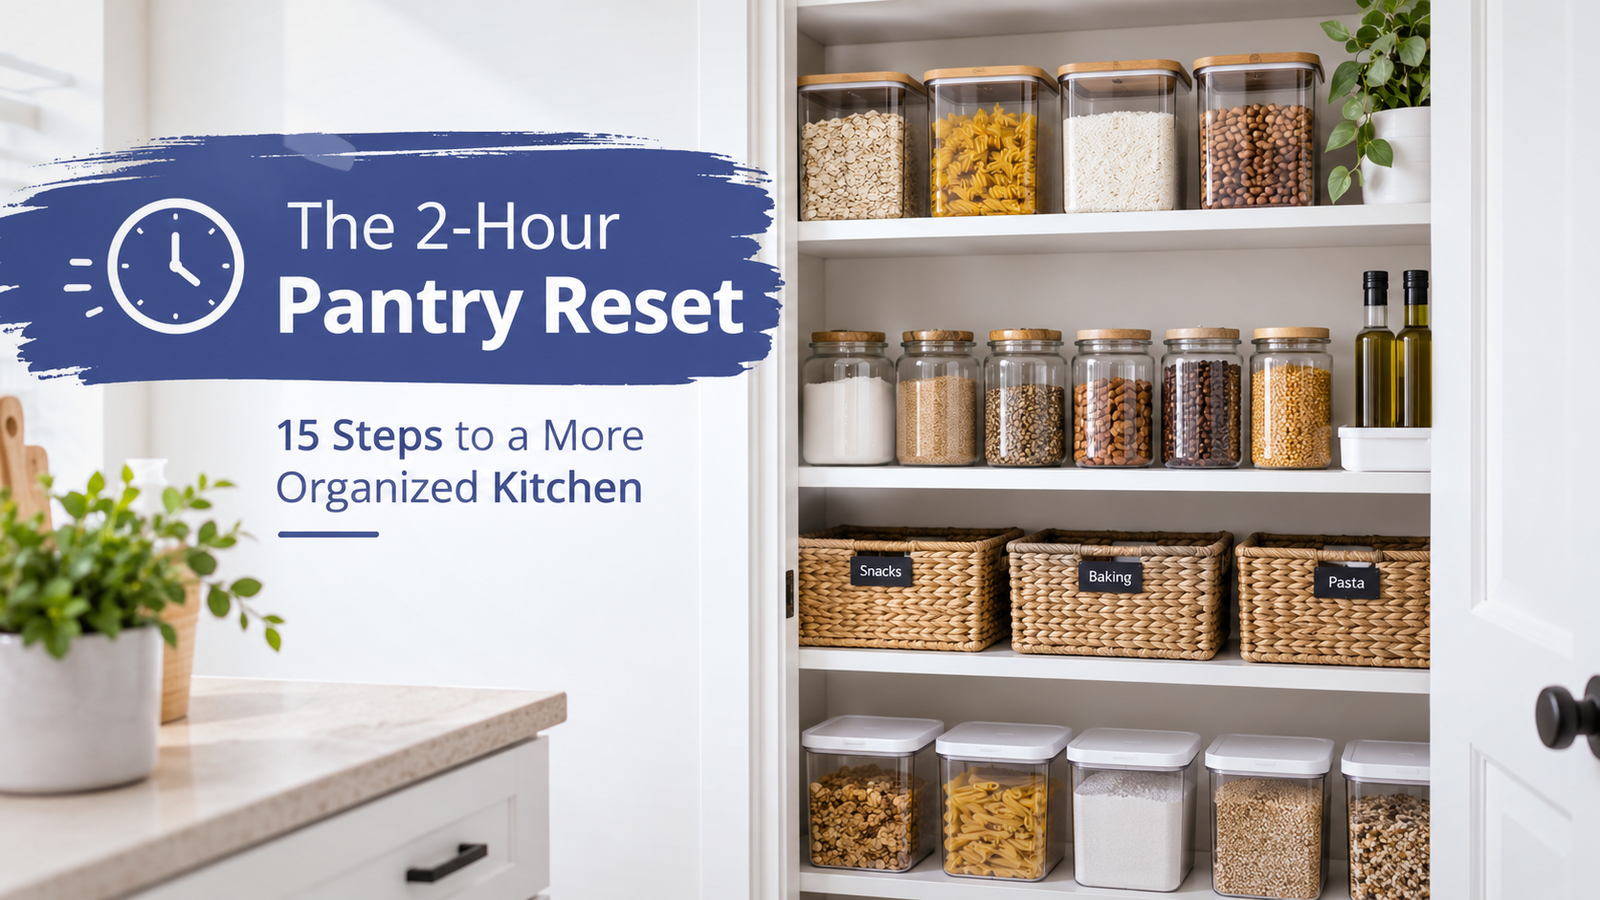
A well-organized pantry can save you time every day because you can see what you have, reach it easily, and avoid buying items you already own. A pantry does not need to look like a perfectly styled space to work well. The goal is to create a system that fits the way you actually shop, cook, and store food.
An organized pantry can also make meal planning easier. When similar foods are kept together, it becomes much simpler to see your pasta, canned foods, baking supplies, snacks, breakfast foods, and other staples at a glance.
Before you start, remember that organization should come after decluttering and measuring. Buying bins and containers before you understand your space can leave you with organizers that do not fit your shelves or storage needs.
If your kitchen is part of a larger home improvement project, you may also find our guide to kitchen remodel ideas useful for thinking about storage, layout, and functionality.
What You Need Before Starting
You do not need a shopping cart full of expensive organizers to reset your pantry. Start with a trash bag or box for items you need to remove, a cleaning cloth, labels if you already have them, and a measuring tape.
Optional supplies include bins, baskets, shelf risers, clear containers, turntables, or storage jars. Do not buy everything at once. First determine what your pantry actually needs.
If you are also organizing other parts of your home, our guides on organizing desk drawers and organizing a bathroom cabinet can help you apply the same simple approach elsewhere.
The 2-Hour Pantry Reset at a Glance
The easiest way to finish a pantry reset in two hours is to give each stage a clear time limit.
| Step | Approx. Time | Main Goal |
|---|---|---|
| Empty the pantry | 10 minutes | See everything you own |
| Check expiration dates | 8 minutes | Remove old or questionable items |
| Declutter | 7 minutes | Remove food you will not use |
| Group similar foods | 8 minutes | Create simple categories |
| Create pantry zones | 8 minutes | Give every category a home |
| Review packaging | 7 minutes | Decide what needs new storage |
| Choose containers | 8 minutes | Match storage to your needs |
| Add bins and baskets | 7 minutes | Control loose or small items |
| Use vertical space | 7 minutes | Increase usable shelf space |
| Fix deep shelves | 8 minutes | Keep items visible and reachable |
| Move everyday foods | 7 minutes | Put frequently used foods within reach |
| Arrange by use | 7 minutes | Make the pantry practical |
| Add labels | 6 minutes | Make categories easy to identify |
| Create a backstock area | 5 minutes | Control extra supplies |
| Final reset | 7 minutes | Finish and test the system |
The exact timing does not need to be perfect. If your pantry is large or heavily cluttered, take longer rather than rushing through important decisions.
15 Steps to Organize Your Pantry
1. Empty the Pantry
Taking everything out gives you a much clearer picture of what you actually have. Remove food from the shelves and place it on a clean counter, table, or floor area where you can see it.
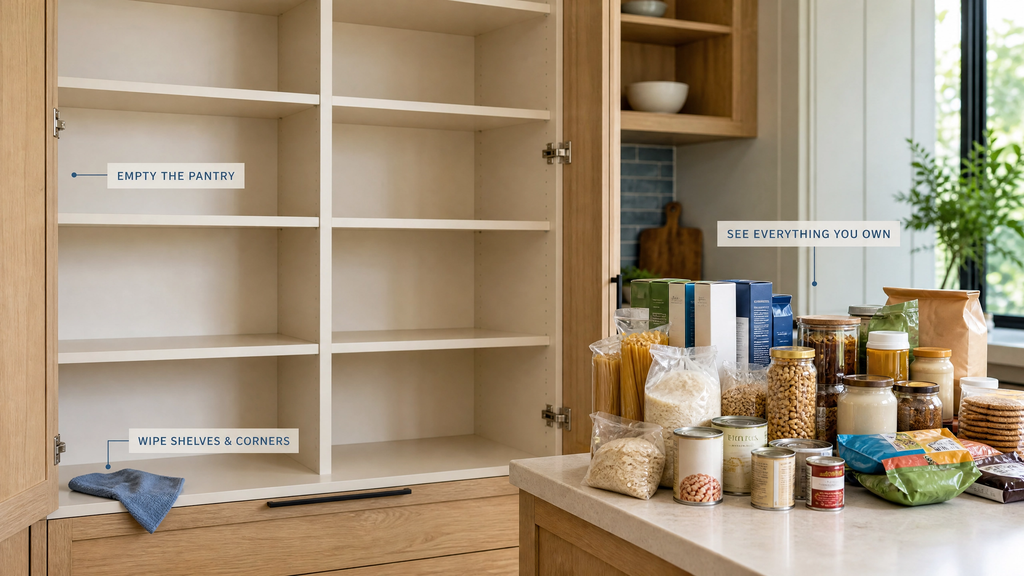
Do not try to organize one shelf at a time while everything else remains hidden. That approach makes it easy to move clutter around instead of actually reducing it.
Once the pantry is empty, quickly wipe down shelves and corners. Look for crumbs, spilled ingredients, sticky spots, or signs of pests before putting food back.
2. Check Expiration Dates
Checking dates before organizing prevents old food from taking up valuable storage space. Separate items that are expired, damaged, leaking, or clearly no longer suitable for use.
For foods with dates that are difficult to interpret, use the manufacturer’s guidance rather than automatically assuming every date means the food is unsafe. When in doubt about a food’s safety, it is better not to take a risk.
As you sort, keep recently purchased items separate from older ones so you can later use the older suitable items first.
3. Declutter What You Don’t Use
The best pantry organization system is the one that does not have to make room for food you will never eat. Look honestly at duplicate products, forgotten ingredients, unwanted foods, and items that no longer fit your household’s eating habits.
If you bought a specialty ingredient for one recipe two years ago and have no realistic plan to use it, it may not deserve permanent shelf space.
Do not declutter just because something is not aesthetically pleasing. The goal is useful storage, not a picture-perfect pantry.
4. Group Similar Foods Together
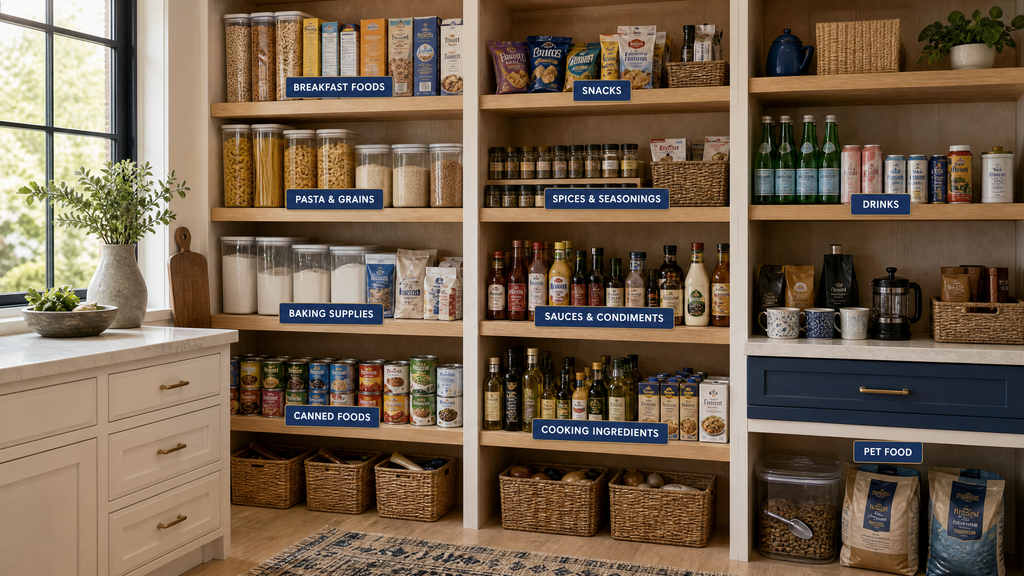
Grouping similar foods is one of the simplest ways to make a pantry easier to use. Create broad categories such as:
- Breakfast foods
- Pasta and grains
- Baking supplies
- Canned foods
- Snacks
- Spices and seasonings
- Sauces and condiments
- Cooking ingredients
- Drinks
- Pet food, if stored in the pantry
Your categories should reflect your household rather than someone else’s pantry. If your family eats snacks every day, snacks may deserve an easy-to-reach zone. If you rarely bake, baking ingredients can go somewhere less accessible.
5. Create Practical Pantry Zones
A pantry zone works best when it matches a real task or food category. Instead of randomly filling empty shelves, decide what each section is supposed to hold.
For example, one shelf might be for breakfast foods, another for cooking staples, and a lower area for heavier items.
Keep foods used together relatively close when possible. You might place pasta near pasta sauce, or baking ingredients near other supplies used for baking.
The important thing is consistency. Once a category has a home, return new purchases to that same area.
6. Decide What Should Stay in Original Packaging
Not every pantry item needs to be transferred into a matching container. Original packaging is often perfectly practical for foods that are used quickly or already come in a convenient, resealable package.
Consider transferring dry ingredients when the original package is difficult to close, takes up unnecessary space, or makes the ingredient hard to identify.
For many other items, keeping the original packaging can save time, money, and unnecessary work.
7. Choose the Right Storage Containers
Buy storage containers only after measuring your shelves and understanding what you need to store. Measure shelf depth, height, and width before ordering organizers.
A container that looks useful online may be too deep for your shelf or too tall for the space between shelves.
Clear containers can work well for frequently used dry ingredients because they make the contents easy to see. Glass jars can be useful for some foods but are heavier, so make sure your shelves are strong enough to support them.
Avoid buying large sets simply because they look coordinated. A few correctly sized containers are usually more useful than a large set filled with sizes you never need.
8. Use Bins and Baskets for Small Items
Bins work best when they gather several loose items into one easy-to-pull section. Use them for snack packets, small baking supplies, drink mixes, or similar items that tend to spread across a shelf.
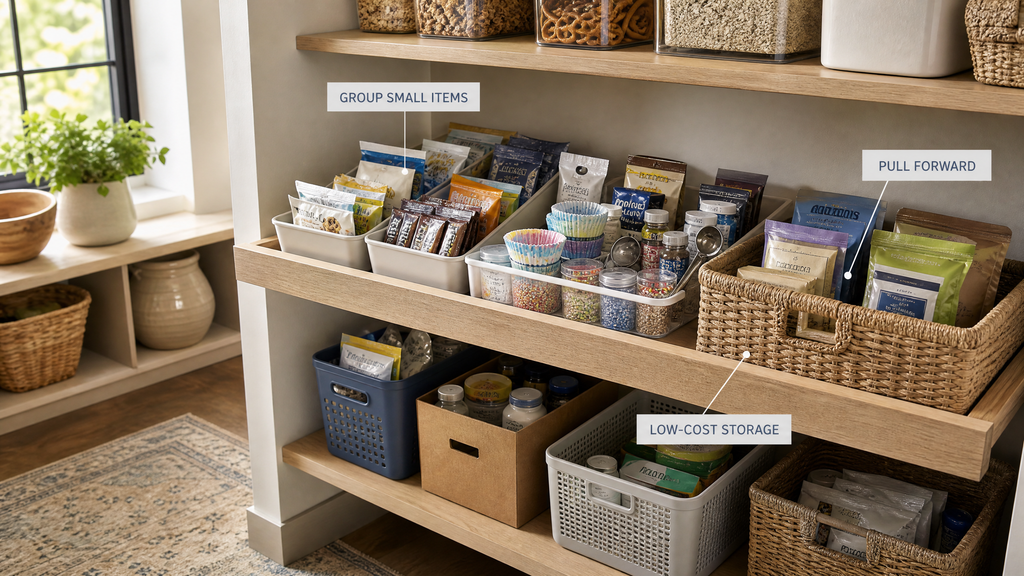
A bin can also make a deep shelf easier to use because you can pull the entire group forward instead of reaching behind individual packages.
You do not have to spend much money on this step. Repurposed boxes, sturdy food containers, baskets, or inexpensive bins can work while you test your system.
9. Make the Most of Vertical Space
Unused vertical space is often the easiest storage opportunity to overlook. If there is a large gap above your cans or jars, consider a shelf riser or another simple way to create a second level.
Vertical organization is particularly useful for short items that otherwise disappear behind taller packages.
However, do not stack items so high that you cannot safely reach them. Better use of space should never make everyday items difficult to access.
10. Organize Deep Shelves So Everything Is Visible
Deep pantry shelves become much easier to manage when you stop treating them like ordinary shelves. Put frequently used items toward the front and use bins, risers, or shallow organizers to prevent smaller products from disappearing behind larger ones.
Avoid creating several rows of loose cans or packages if you cannot see what is behind them.
If you have very deep shelves, consider using pull-out bins or containers that can be removed as a group. This can make the back of the shelf much more accessible.
11. Keep Everyday Foods Within Easy Reach
The foods you use every day should occupy your easiest-to-reach storage areas. Think about what you grab most often rather than automatically following a visual organization trend.
Breakfast staples, snacks, coffee supplies, cooking oils, and frequently used grains may deserve middle-shelf positions.
Heavier items can go on lower shelves, while rarely used or lightweight items can usually occupy higher areas.
12. Arrange Items by Frequency of Use
Organizing by frequency of use can make a pantry feel easier to navigate even without adding more storage.
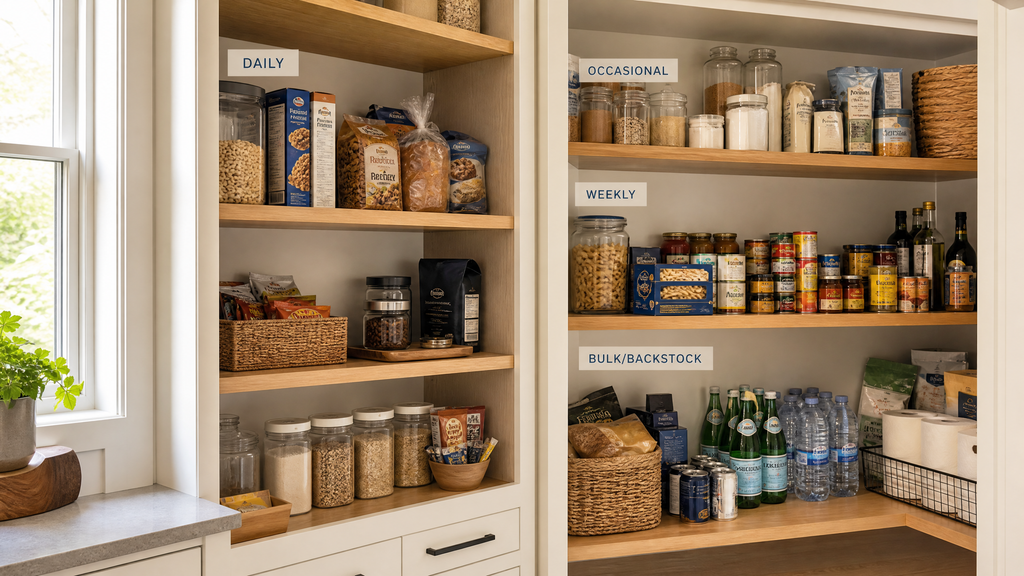
A simple system is:
- Daily: eye-level and easiest to reach
- Weekly: nearby but slightly less accessible
- Occasional: higher or farther back
- Bulk/backstock: dedicated lower or separate area
This system reduces unnecessary movement and helps keep the pantry organized after grocery shopping.
13. Label Containers and Pantry Zones
Labels are most useful when they make your system easier to understand at a glance. You can label containers with the food name or label larger bins by category.
Labels are especially useful when multiple family members use the pantry. Everyone can quickly see where an item belongs.
You do not need expensive custom labels. Simple printed labels, handwritten labels, or reusable chalk-style labels can work well.
14. Give Bulk Items and Backstock a Dedicated Area
Backstock only helps when you can remember that you have it. If extra food disappears into a deep basket or the back of a shelf, you may accidentally buy more of the same thing.
Create one clearly defined area for extras. When you open a new package, check whether another unopened package is already waiting in your backstock area.
Do not feel pressured to keep a large stockpile. Your ideal amount of backup food depends on your shopping habits, household size, storage space, and how often you shop.
15. Do a Final Pantry Reset
The final step is not simply putting everything back; it is checking whether the system actually makes sense. Stand back and look at the pantry as if you were using it for the first time.
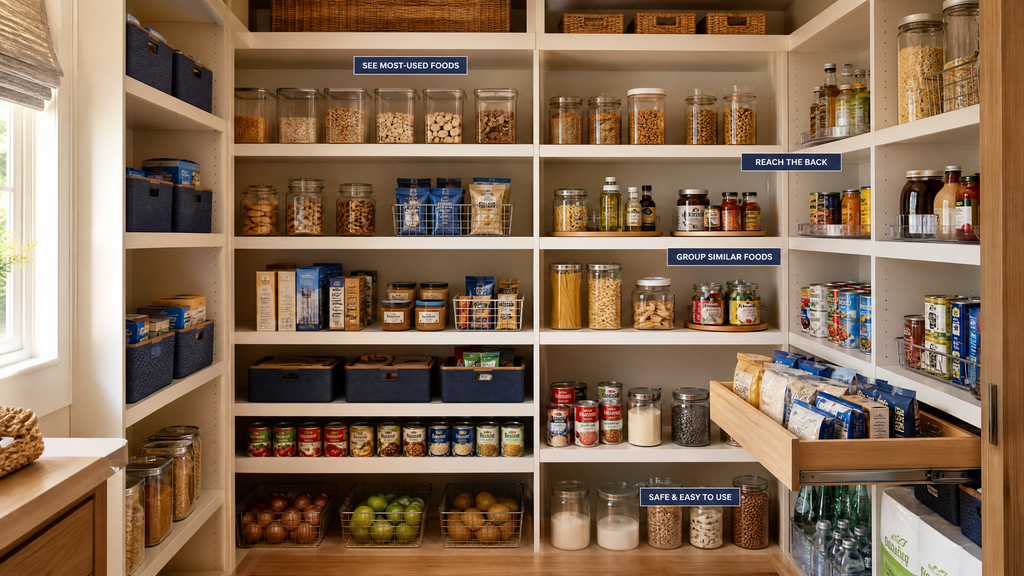
Can you see the foods you use most? Can you reach the back of the shelves? Are similar foods together? Are heavy items stored safely? Is anything blocking another item?
Make small changes before you finish. A five-minute adjustment now can save you from rebuilding the entire system next month.
Pantry Organization Ideas for Different Kitchen Layouts
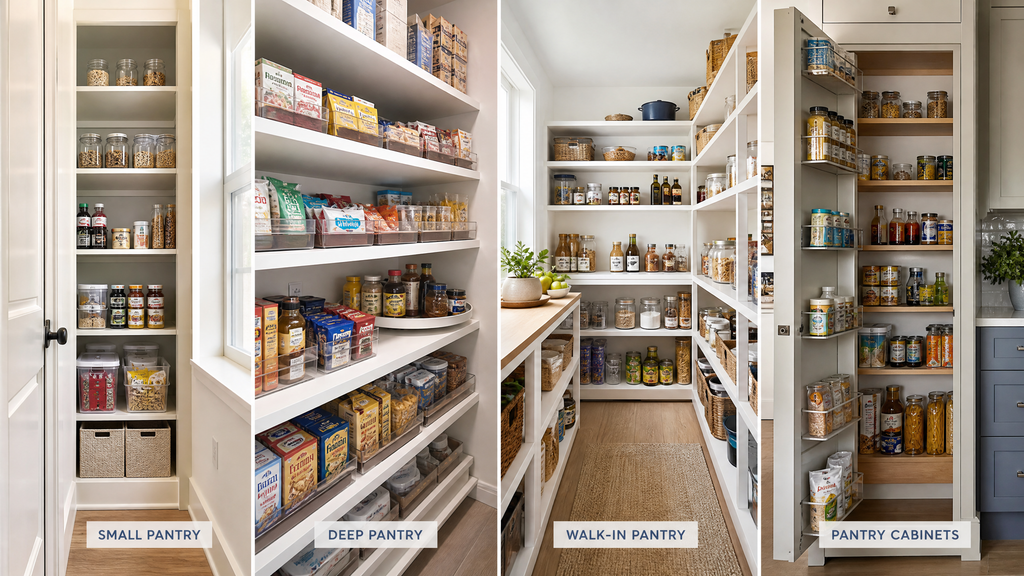
Small Pantry
A small pantry needs better decisions more than it needs more organizers. Use vertical space, narrow bins, and clearly defined categories to prevent every shelf from becoming a mixed pile.
Keep your most-used foods at eye level and avoid storing large quantities of items that are easy to buy again.
Deep Pantry
Deep pantries work best when every section can be pulled forward or seen clearly. Use shallow bins, shelf risers, or turntables where they genuinely improve access.
Avoid putting rarely used items in front of everyday foods simply because they fit there.
Walk-In Pantry
A walk-in pantry gives you more room, but it can still become cluttered without clear zones. Use shelves according to category and keep enough open space to move around comfortably.
Reserve lower shelves for heavier items and keep commonly used ingredients within easy reach.
Pantry Cabinets
Cabinet pantries benefit from small organizers that make narrow or deep shelves easier to access. Door-mounted storage can sometimes provide additional space, but make sure the added weight is suitable for the cabinet hardware.
If your kitchen storage is consistently too limited, the problem may be the layout rather than your organization skills.
Best Ways to Keep Your Pantry Organized
A pantry stays organized when the system is easy enough to maintain during a normal busy week. You should not need to completely reorganize it every few days.
- Return items to their assigned zones after shopping.
- Put older suitable products toward the front.
- Avoid overfilling containers.
- Keep a small amount of open space on shelves.
- Combine duplicate items when appropriate.
- Review expiration dates regularly.
- Avoid buying organizers without a specific purpose.
- Do a quick pantry reset once a month.
If you are working on several home projects at once, simple maintenance systems can make a bigger difference than large makeovers. The same principle applies to other areas of the home, including small entryway organization and other storage projects.
Common Pantry Organization Mistakes to Avoid
Most pantry problems come from creating a system that looks good but does not work for everyday life.
Buying Organizers Before Measuring
A container cannot fix a storage problem if it does not fit the shelf. Measure first and shop second.
Using Too Many Containers
Transferring every item into matching containers can create extra work without improving access. Use containers where they solve a real problem.
Hiding Frequently Used Foods
A beautiful pantry is not useful if you have to move five things every morning to find your cereal or coffee.
Overfilling Shelves
An organized shelf still needs breathing room. Leave enough space to remove items without knocking over everything around them.
Creating Too Much Backstock
Buying extra food can be useful for some households, but excessive backstock can hide what you already own and lead to duplicate purchases.
Organizing for Appearance Alone
Your pantry does not have to look like a showroom. Organize for the way you cook, shop, and live.
What Reddit Users Say About Pantry Organization
One useful lesson from a Reddit discussion about pantry organization is that you do not need to spend a lot of money before you can create a better system. In the discussion, users repeatedly suggested measuring the pantry first, decluttering before buying storage, and choosing organizers based on what they actually use rather than copying another person’s pantry.
Several commenters also shared low-cost ideas such as reusing jars, repurposing boxes, visiting thrift stores or yard sales, and using inexpensive bins while testing a storage system. One commenter specifically noted that an expensive container set included sizes that were not useful for their pantry, while another recommended using existing containers before investing in a complete matching system.
My biggest takeaway is simple: organize your food before you organize your containers. That means understanding what you eat, how much you normally keep, and how your shelves are built before spending money.
The discussion also raises an important point about backstock. If extra food is stored somewhere you rarely see it, the system can actually make the pantry harder to manage. A small, visible backstock area is often more practical than filling every spare corner.
You can read the Reddit discussion here to see the original suggestions and different approaches from other homeowners and homemakers.
Final 2-Hour Pantry Reset Checklist
A simple checklist makes it easier to repeat the system when your pantry starts getting messy again.
The best pantry organization system is not the most expensive or the most picture-perfect one; it is the one you can maintain without thinking about it. Start with what you already have, make the space easier to use, and only buy storage products when they solve a specific problem.
A two-hour reset can give you a much better starting point, but the real improvement comes from the small habits you follow afterward.
FAQs
How do I organize my pantry quickly?
Start by emptying the pantry, removing expired or unwanted food, and grouping similar items together. Then create simple zones, place frequently used foods within easy reach, and use bins or containers only where they improve storage. A focused two-hour reset can make a noticeable difference.
What is the best way to organize a pantry?
The best pantry organization method is to group similar foods and give each category a consistent place. Keep everyday items at eye level, heavier foods on lower shelves, and less-used products higher up. Leave enough space so items remain visible and easy to remove.
How do I organize a small pantry?
Use vertical space and prioritize the foods you use most often. Shelf risers, narrow bins, stackable organizers, and door storage can help increase usable space. Avoid overbuying and keep only the amount of backstock your pantry can comfortably handle.
How do I organize deep pantry shelves?
Use shallow bins, pull-out organizers, or shelf risers to prevent items from disappearing at the back. Keep frequently used foods toward the front and group similar products together. The goal is to make the entire shelf visible and easy to reach.
Do pantry containers really help?
Pantry containers help when they solve a specific storage problem. Clear containers can make dry foods easier to see, while airtight containers can help protect suitable dry goods from moisture and pests. However, you do not need to transfer every food into a container.
What are the 7 pantry zones?
Seven useful pantry zones are breakfast foods, snacks, canned foods, grains and pasta, baking supplies, cooking ingredients, and backstock. You can adjust these categories based on what your household eats and how often you shop.
What are some common pantry organization mistakes?
Common mistakes include buying organizers before measuring, overfilling shelves, using too many containers, hiding frequently used foods, and creating excessive backstock. Another mistake is organizing only for appearance instead of making the pantry easy to use and maintain.
Sources & References
Food storage and pantry organization are closely connected to proper food handling and storage practices. The following resources provide reliable guidance:
- FDA – Are You Storing Food Safely? — Food storage and safety guidance.
- USDA – Best Practices for Handling and Storing Food — Practical home food-storage recommendations.
- USDA – Food Product Dating — Information about food dates and quality.
- FDA – How to Cut Food Waste and Maintain Food Safety — Guidance on food dating, storage, and reducing waste.