
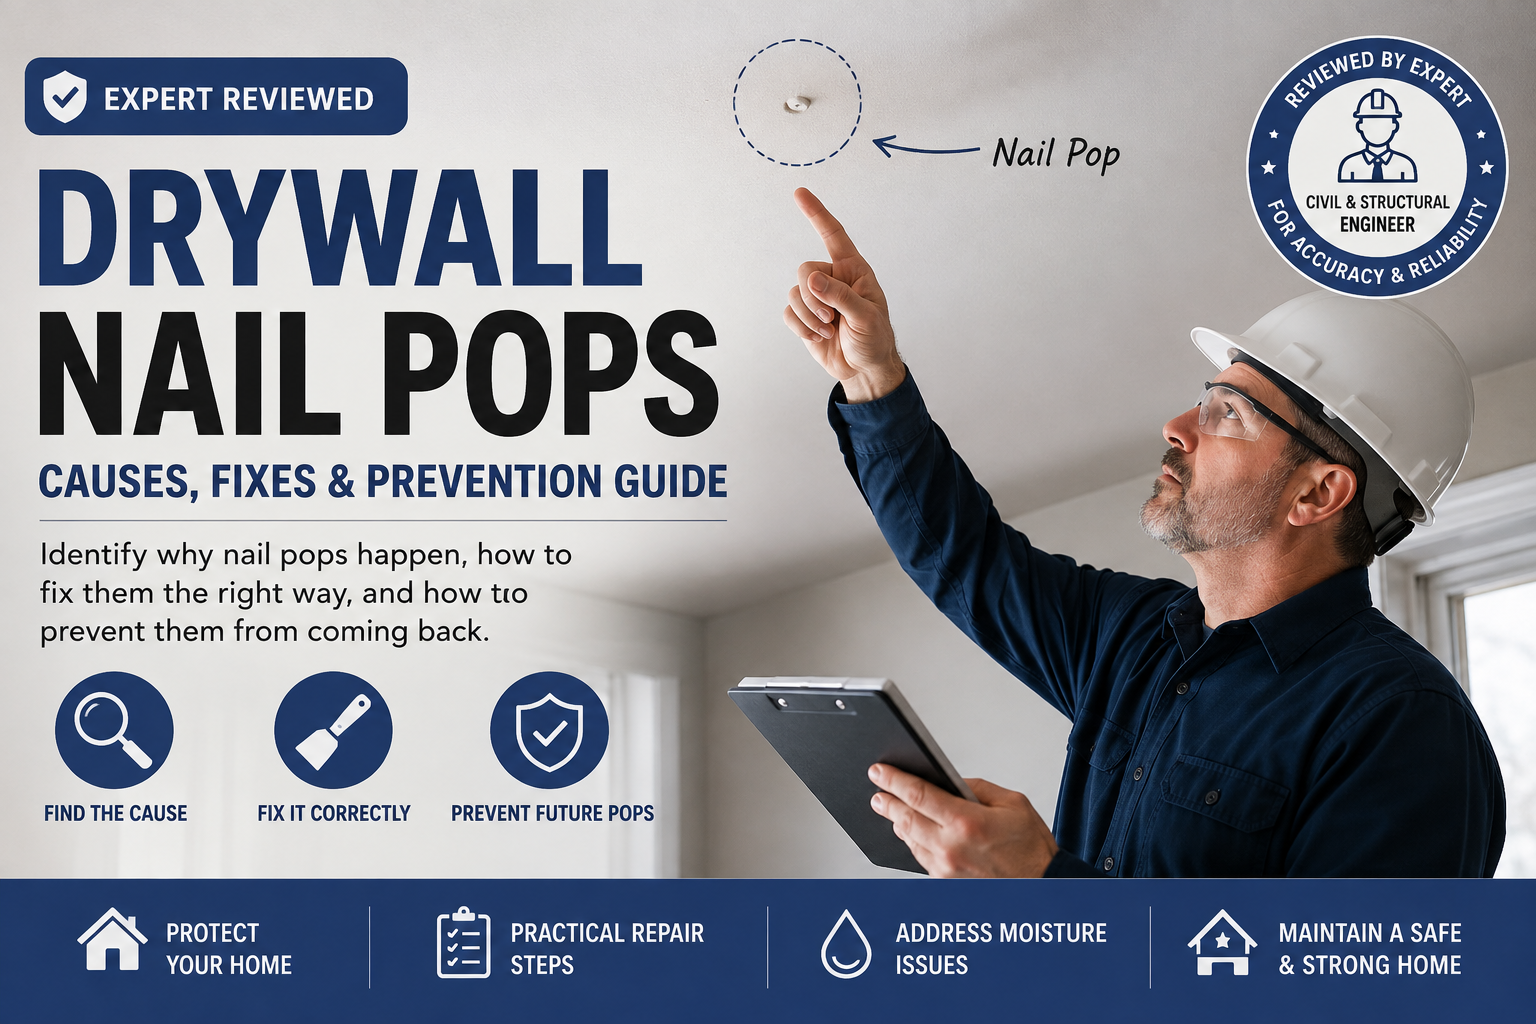
Expert Review
This article was reviewed by David A. Miller, P.E., Civil & Structural Engineer, for general accuracy and practical home-improvement guidance. The review considered the common causes of drywall nail pops, warning signs that may require further inspection, and the general repair and prevention methods discussed in this guide.
This guide is intended to help homeowners understand common drywall nail-pop problems and make informed decisions about basic repairs. Because every building is different, recurring nail pops, significant cracking, moisture damage, ceiling movement, sagging, or other unusual changes should be assessed by an appropriately qualified local professional.
Drywall nail pops can start as a tiny bump, but they can quickly become an annoying eyesore when they keep coming back. These small raised spots usually appear when a drywall fastener moves, loosens, or pushes through the surface of the drywall.
Most nail pops are cosmetic and can be repaired with a few basic tools. However, repeated pops, large cracks, moisture stains, sagging ceilings, or other changes around the same area can point to a problem that deserves closer attention.
In this guide, you’ll learn what drywall nail pops are, what causes them, how to tell when they may be a warning sign, and how to repair them properly so they are less likely to return.
What Are Drywall Nail Pops?
A drywall nail pop is a small raised bump or crack that appears when a drywall fastener moves toward or through the surface of the drywall. The fastener may be a nail, screw, or another type of drywall fastening point.
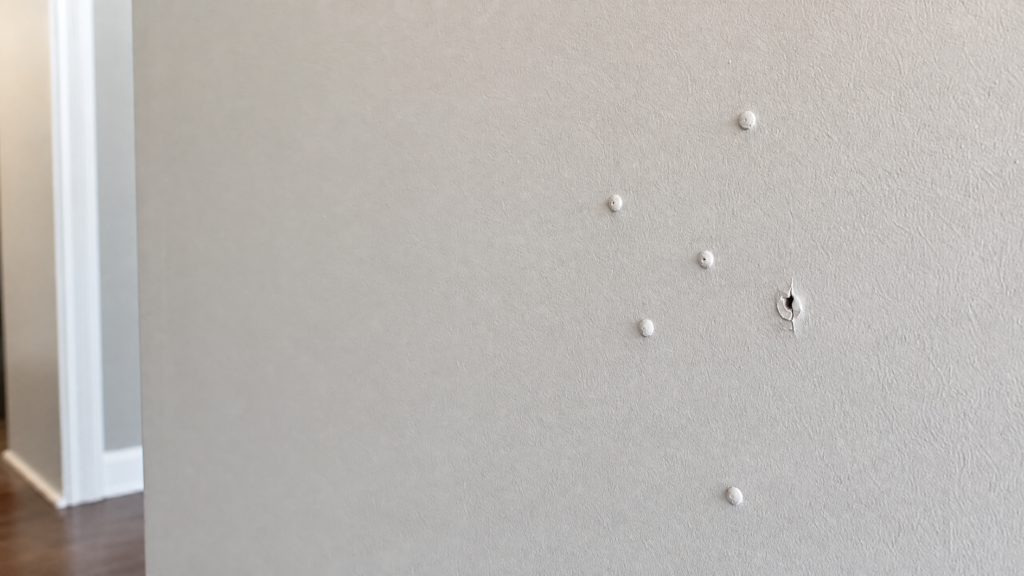
When drywall is installed, fasteners hold the panels against the home’s wood or metal framing. If the framing moves, the drywall shifts, or a fastener becomes loose, the surface around that fastener can push outward.
You may notice a nail pop as:
- A small circular bump
- A raised spot that catches light
- A crack around a fastener
- Joint compound that has broken away
- A small area where the fastener head becomes visible
- A bump that becomes more noticeable after painting
Nail pops can occur on walls and ceilings. They are especially noticeable on smooth painted surfaces because even a small raised area can create a visible shadow.
What Do Nail Pops Look Like?
A typical nail pop looks like a small raised circle, crack, or shallow mound on an otherwise flat drywall surface. In some cases, the fastener itself may be visible through the paint or joint compound.
A single small pop is usually not a reason to panic. The more useful question is whether it is isolated or part of a larger pattern.
For example, one or two small nail pops in an older room may simply be related to normal movement of the building materials. On the other hand, many new pops appearing across a ceiling at the same time deserve more attention.
It is also important to distinguish nail pops from other drywall problems. A long crack, water stain, sagging area, or large bulge may have a different cause and should not automatically be treated as a simple nail-pop repair.
What Causes Drywall Nail Pops?
Drywall nail pops usually happen because the drywall, framing, or fastener moves after installation. Several factors can contribute to this movement, and more than one cause may be involved.
1. Natural Wood Movement
Wood framing naturally expands and contracts as temperature and moisture conditions change. When the wood moves, it can place pressure on the drywall and its fasteners.
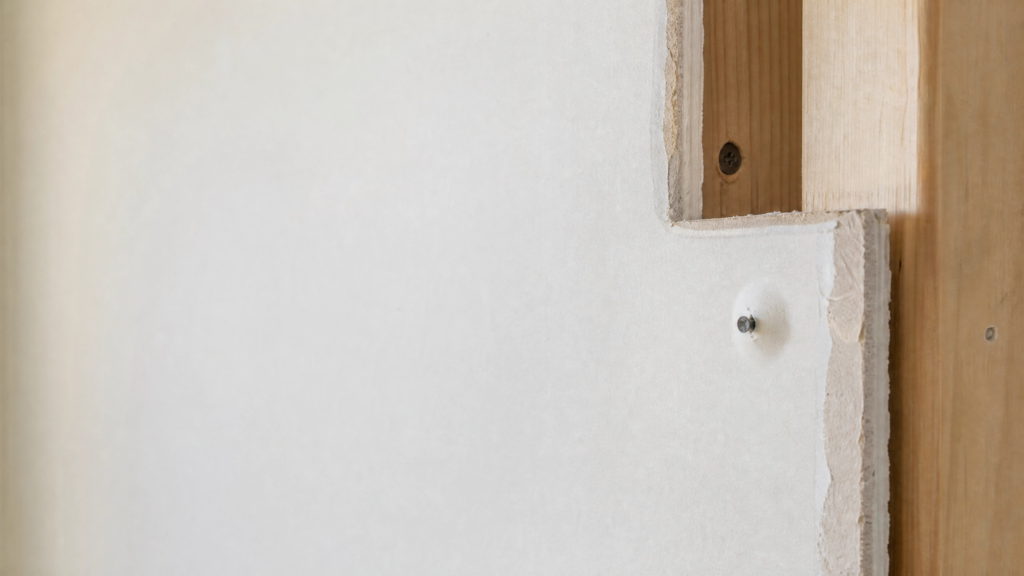
This movement is common in homes with wood framing. Seasonal changes in indoor humidity can cause framing lumber to gain or lose small amounts of moisture, which may create enough movement to loosen a fastener or push against the drywall.
This does not automatically mean there is a serious structural problem. Small amounts of material movement are normal in many homes.
2. Improper Drywall Installation
Poor installation can make nail pops more likely because the fasteners may not hold the drywall securely. A fastener that is not properly placed or does not adequately secure the panel can loosen over time.
Common installation problems include fasteners that are:
- Too shallow
- Overdriven
- Driven at an improper angle
- Placed too close to an edge
- Not properly secured into framing
- Too widely spaced for the installation requirements
Modern drywall installations commonly use drywall screws rather than traditional nails because screws can provide more secure fastening when installed correctly.
3. Loose or Poorly Driven Fasteners
A loose fastener can gradually move and become visible through the drywall surface. If a nail or screw does not remain firmly secured to the framing, normal movement can eventually cause a pop.
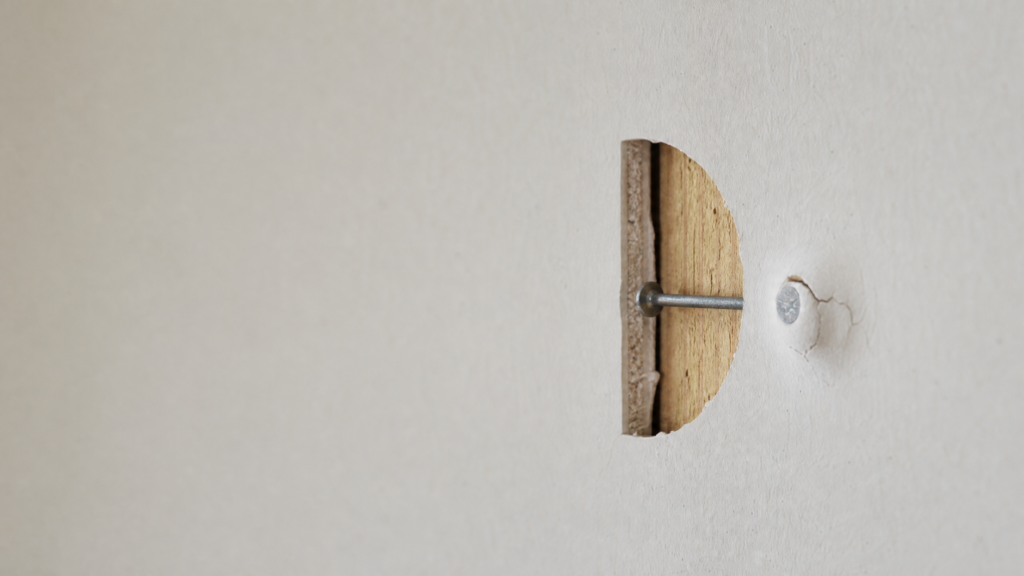
Simply pushing the fastener back into place may not solve the underlying issue. If the fastener is loose, it can move again after the surface is repaired.
That is why a lasting repair usually involves securing the drywall properly before applying joint compound.
4. Building Movement or Vibration
Normal building movement, vibration, and settling can sometimes contribute to drywall fastener movement. Homes are not completely rigid structures, and small movements can occur over time
Nearby construction, repeated vibration, changes to the building, or normal settling may sometimes contribute to drywall cracks or nail pops.
A few isolated pops are generally different from widespread movement accompanied by large cracks or other changes. The surrounding conditions matter.
5. Moisture and Humidity Changes
Moisture can affect both drywall and the materials supporting it, making nail pops more likely in some situations. Drywall is particularly vulnerable to prolonged moisture exposure.
Bathrooms, kitchens, laundry areas, exterior walls, and ceilings below plumbing or roof areas deserve extra attention if nail pops appear together with stains, soft spots, discoloration, or peeling paint.
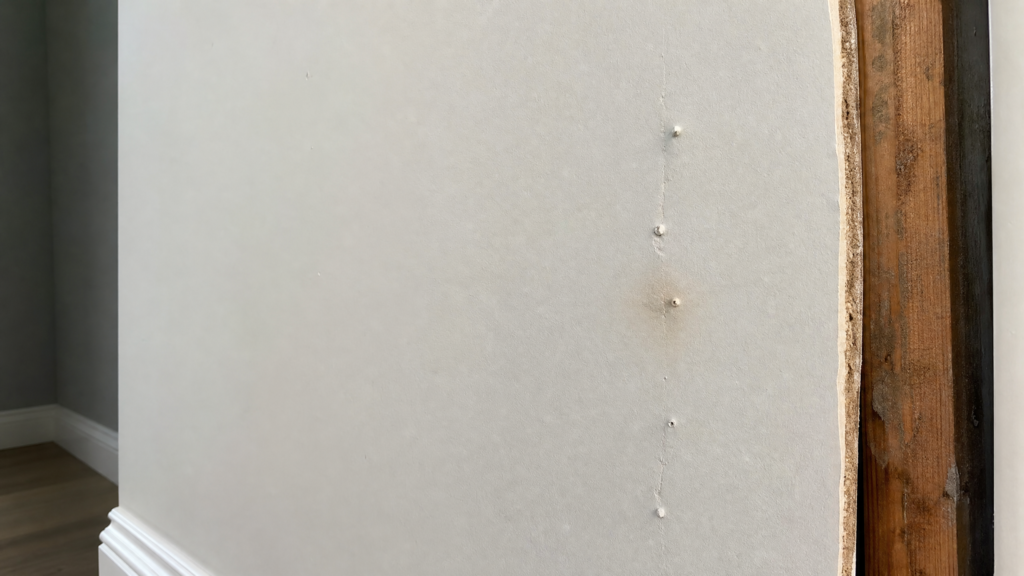
If moisture is the cause, patching the nail pop alone will not solve the problem. The source of the moisture should be identified and corrected first.
For broader guidance about cracks and how to assess them, you can also read this related guide to wall cracks.
6. Aging or Settling of the Home
Older drywall can develop nail pops simply because materials change and move over many years. Houses naturally experience small changes as materials age.
This is one reason you may notice nail pops appearing in an older room even when there has been no obvious recent damage.
The age of the home, location of the pops, number of affected areas, and presence of other symptoms can help determine whether the issue is simply cosmetic or worth investigating further.
Are Drywall Nail Pops a Problem?
Most isolated drywall nail pops are cosmetic defects rather than signs of a major structural problem. A small number of nail pops can often be repaired as part of normal drywall maintenance.
However, the pattern matters more than the presence of one small bump.
If you notice a few isolated pops with no major cracks, moisture, sagging, or other unusual changes, the problem may simply be related to normal movement or an aging drywall installation.
When Nail Pops Are Usually Cosmetic
An isolated nail pop is generally less concerning when the surrounding drywall is flat, dry, and otherwise in good condition.
For example, a small pop in an older bedroom wall with no associated cracking or moisture may simply need a proper drywall repair.
Keep an eye on repaired areas, though. If the same location repeatedly pops after being properly repaired, it is worth looking more closely at the fastener and the framing behind the drywall.
Warning Signs That Need Attention
Nail pops deserve closer inspection when they appear together with other visible changes in the wall or ceiling.
Pay particular attention if you notice:
- Many nail pops appearing within a short period
- Large or rapidly growing cracks
- Long cracks extending from doors, windows, or ceiling corners
- Sagging or bulging drywall
- Water stains
- Soft or swollen drywall
- Peeling paint around the affected area
- Repeated nail pops in exactly the same location
- Significant changes after a leak or water event
- Other unusual movement in the surrounding wall or ceiling
These signs do not automatically mean the home has a structural defect. They simply mean that repeatedly patching the visible pop may not be the best approach.
If you’re unsure whether a crack is simply cosmetic, compare it with the different patterns discussed in your wall cracks guide.
Nail Pops in Ceilings: What Do They Mean?
Ceiling nail pops can have the same basic causes as wall nail pops, but their location makes moisture and drywall movement especially important to consider.
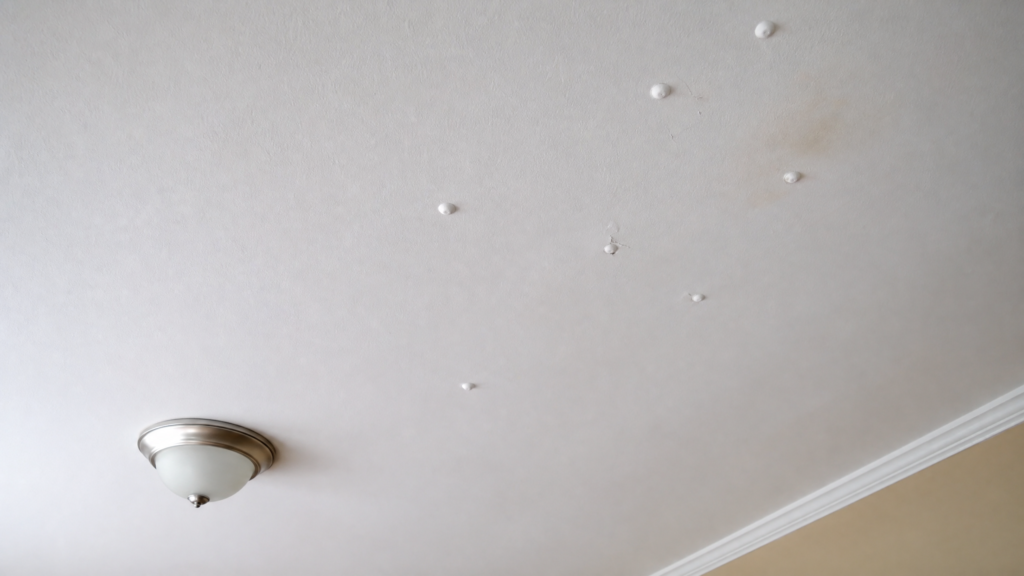
A ceiling nail pop may develop because of framing movement, fastener problems, installation issues, or changes in the materials above the ceiling.
Why Do Nail Pops Appear on Ceilings?
Ceiling drywall can develop nail pops when the panel or framing moves enough to affect the fasteners holding it in place.
Because drywall panels are attached overhead, changes in framing, vibration, moisture, or installation quality can affect how securely they remain fastened.
A few small pops in an otherwise dry and stable ceiling may be a routine repair. But if the pops are accompanied by a sagging section, water stain, discoloration, or soft drywall, investigate the cause before repairing the surface.
When Should Ceiling Nail Pops Be Checked?
A ceiling nail pop should be checked more carefully when there are signs of water, sagging, or widespread drywall movement.
Look above the affected area when it is safe and practical to do so. Depending on the location, possible sources can include plumbing, an attic, a roof area, HVAC equipment, or another room above.
Do not simply cover a water-damaged ceiling with joint compound and paint. The moisture source needs to be addressed first.
How to Fix Drywall Nail Pops
The best nail-pop repair starts by securing the drywall instead of simply covering the visible bump.
A basic repair can usually be completed with common drywall tools and materials. The exact approach depends on whether the fastener is still loose, whether the drywall has been damaged, and whether the surrounding surface is dry and stable.
What You’ll Need
A small drywall repair requires only a few basic materials and tools.
You may need:
- Drywall screws
- Screwdriver or drill
- Putty knife or drywall knife
- Joint compound
- Sanding sponge or fine-grit sandpaper
- Primer
- Matching paint
- Clean cloth
- Safety glasses and a dust mask for sanding
Use appropriate safety equipment when sanding drywall compound, and keep dust away from areas where it could create a problem.
Step 1: Remove or Reset the Loose Fastener
Start by carefully removing or securing the fastener that caused the pop.
If a nail is visibly loose or protruding, remove it carefully rather than simply hammering it deeper into the drywall.
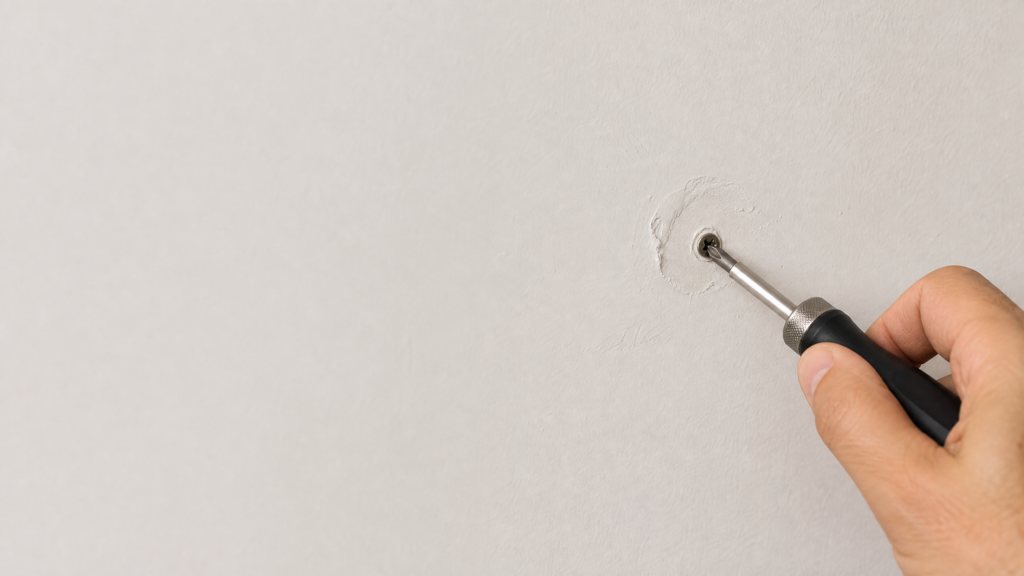
If the drywall around the fastener is still sound, a suitable drywall screw can be installed into the framing near the original fastener to help secure the panel.
Avoid placing a new screw so close to the damaged fastener that you weaken the same small area of drywall.
Step 2: Add a New Drywall Screw if Needed
A properly positioned drywall screw can help hold the panel securely against the framing.
Drive the screw into the framing so that its head sits slightly below the drywall surface without breaking through the paper face.
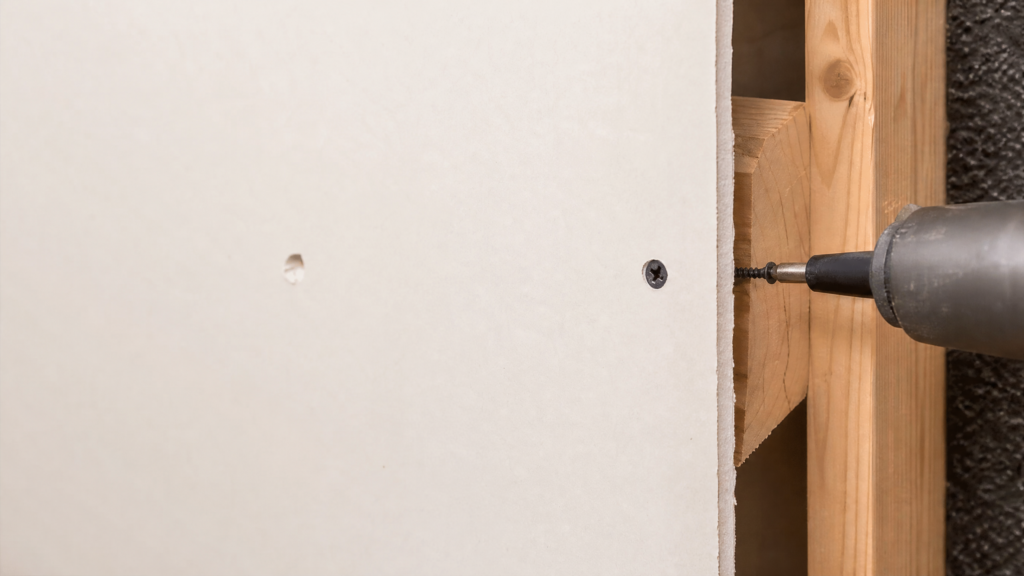
Do not drive the screw excessively deep. A damaged drywall paper surface can reduce the fastener’s holding ability and make future problems more likely.
The goal is a secure panel with a shallow depression that can be covered with joint compound.
Step 3: Apply Joint Compound
Once the drywall is secure, apply a thin layer of joint compound over the repaired area.
Use a clean drywall knife to spread the compound beyond the damaged spot. Feathering the edges helps create a smoother transition between the repair and the surrounding wall.
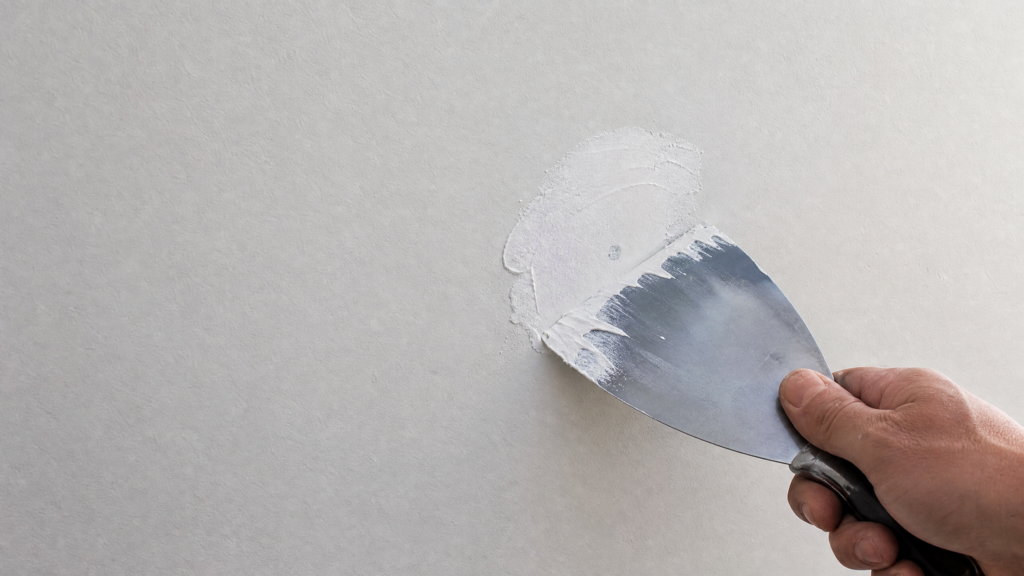
Do not apply a very thick layer in one pass. Thin layers are usually easier to control and sand.
Allow the compound to dry according to the product instructions before applying another layer if necessary.
Step 4: Let It Dry and Sand Smooth
A smooth repair depends on allowing the compound to dry completely before sanding.
Once dry, gently sand the repaired area until it feels flat when you run your hand over it.
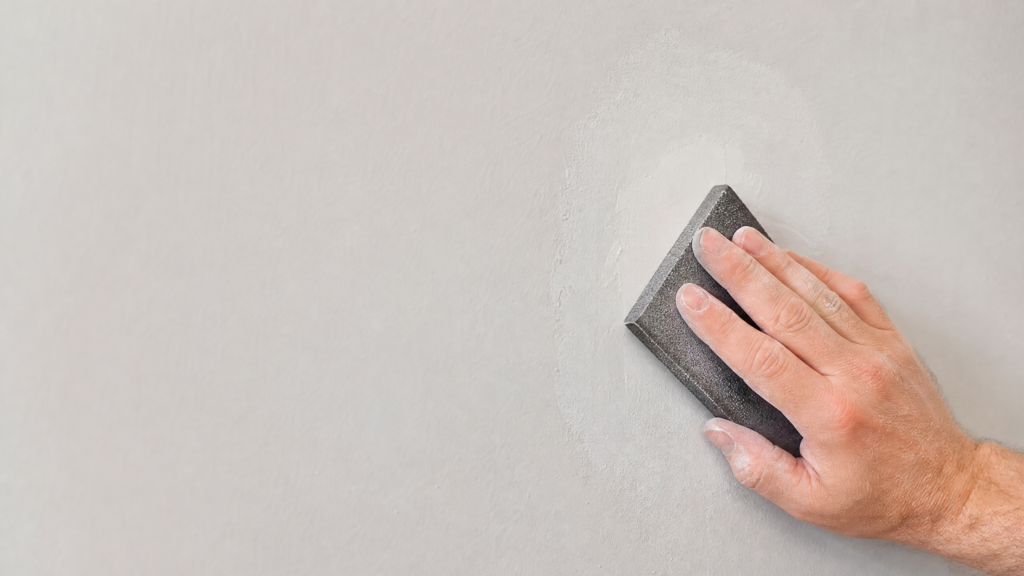
Avoid aggressive sanding because you can damage the drywall paper or create a larger low spot.
Use a clean cloth to remove dust before priming.
Step 5: Prime and Paint the Repair
Primer helps create a more uniform surface before you apply the final paint.
Apply primer to the repaired area and allow it to dry. Then apply matching wall or ceiling paint as needed.
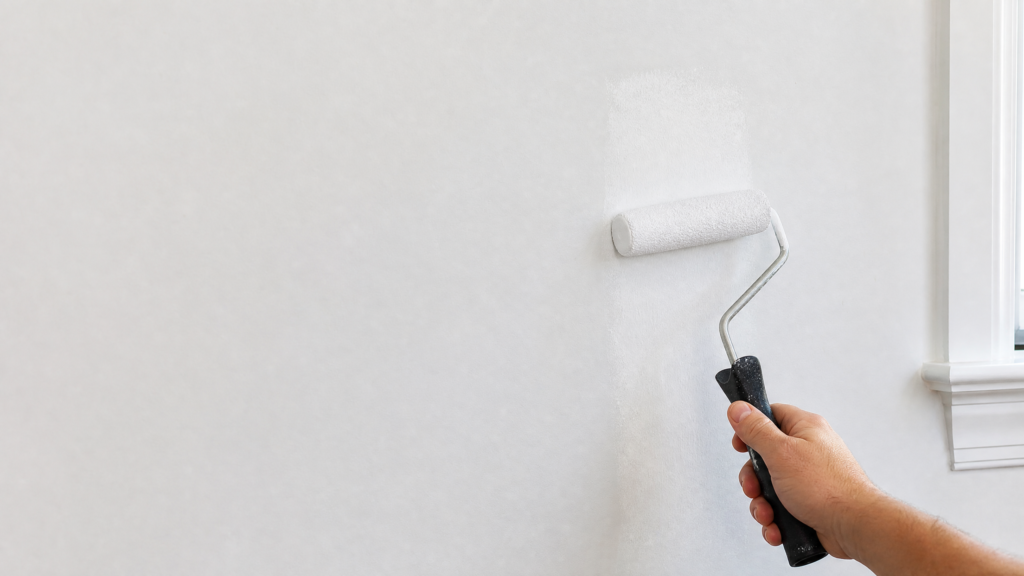
For the best visual result, the final paint may need to extend beyond the repaired spot so the finish blends with the surrounding surface.
If you are repairing several areas in the same room, completing the repairs together can make touch-up painting easier.
How to Prevent Drywall Nail Pops
Preventing nail pops starts with controlling the conditions that allow drywall fasteners and framing to move.
You cannot prevent every nail pop, especially in older homes, but proper installation and maintenance can reduce the chance of recurring problems.
Use Proper Drywall Fasteners
Correctly selected and installed drywall screws can provide a more secure connection than relying on loose or poorly installed fasteners.
Fasteners should be appropriate for the drywall and framing system being used and installed according to accepted installation practices.
Avoid Overdriving Fasteners
A fastener should hold the drywall securely without breaking through the drywall paper.
Overdriving a screw can damage the paper surface and reduce its holding strength. Proper depth matters just as much as having enough fasteners.
Address Moisture Problems Early
Fixing moisture problems early can protect drywall and reduce the chance of repeated damage.
Check for leaks around plumbing, roofs, windows, bathrooms, and other areas where water may enter the building.
If drywall becomes saturated, simply repairing the visible nail pop is unlikely to solve the larger issue.
Repair Recurring Pops Properly
A nail pop that keeps returning should be treated as a recurring problem rather than repeatedly covered with compound.
If a repair fails again in the same place, check whether the fastener is loose, whether the drywall is securely attached, and whether moisture or movement is affecting the area.
Drywall Nail Pops vs. Plasterboard & Sheetrock Nail Pops
Drywall, plasterboard, and Sheetrock generally refer to closely related wall or ceiling panel materials, although the terms can have regional or brand-specific use.
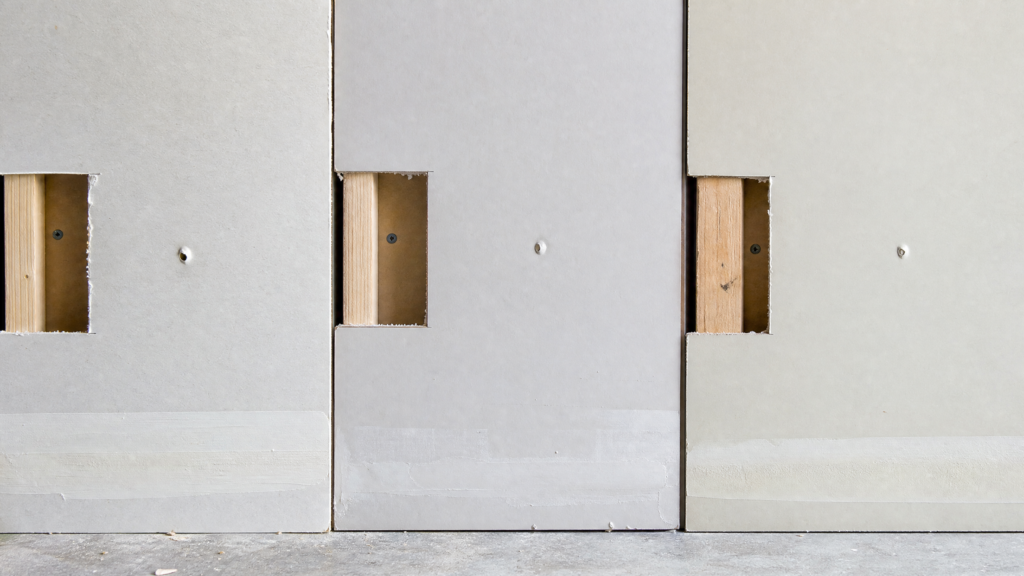
“Drywall” is the common general term in the United States and Canada, while “plasterboard” is widely used in other regions. Sheetrock is a well-known brand name that is often used informally to refer to drywall.
That means someone searching for “nail pops in sheetrock” or “plasterboard nail popping” may be dealing with essentially the same type of fastener-related surface problem.
The repair principles are generally similar: identify the cause, secure the panel correctly, repair the damaged surface, and address any underlying moisture or movement.
Using the correct product and repair method for the specific wall system is still important, particularly in older homes or unusual construction.
When Should You Call a Professional?
Professional help is worth considering when nail pops are widespread, recurring, or accompanied by other signs of building damage.
A qualified contractor or appropriate building professional can inspect the surrounding area and help determine whether the problem is limited to drywall or connected to another issue.
- Numerous nail pops are appearing throughout a room or home
- Pops are accompanied by significant cracks
- A ceiling is sagging or bulging
- You see active water damage
- Drywall feels soft or swollen
- Repairs repeatedly fail
- You notice substantial changes in the structure or surrounding surfaces
- You are unsure whether the damage is cosmetic or related to a larger building problem
For a single small nail pop, professional inspection may not be necessary. For widespread or unexplained damage, however, looking beyond the visible surface can prevent you from repeatedly repairing the same problem.
Key Takeaways
Most drywall nail pops can be repaired, but understanding why they appeared is the key to getting a lasting result.
Small isolated pops are often cosmetic and may result from normal movement, aging, installation issues, or changes in framing. A proper repair should secure the drywall before the damaged area is filled, sanded, primed, and painted.
Ceiling nail pops deserve additional attention when they appear with water stains, sagging, soft drywall, or other signs of moisture damage.
The most important rule is simple: don’t treat every nail pop the same way. Look at the size, location, number of pops, surrounding damage, and whether the problem keeps returning.
When the problem is isolated and the drywall is otherwise sound, a careful DIY repair can restore a smooth surface. When nail pops occur alongside major cracks, moisture, sagging, or widespread movement, finding the underlying cause should come before cosmetic repair.
For more practical home and living ideas, explore the Home & Living section on Daily Idea Book.
You can also visit Daily Idea Book for more practical guides covering home improvement, organization, lifestyle, gardening, recipes, pets, and everyday ideas.
Frequently Asked Questions
When should I worry about nail pops?
You should worry more about nail pops when they appear in large numbers, keep coming back, or occur with other signs such as large cracks, sagging drywall, water stains, soft spots, or noticeable movement. A single small nail pop is usually a cosmetic drywall issue. If nail pops appear suddenly or are accompanied by moisture or structural changes, consider having the area inspected by a qualified professional.
What is the best way to fix nail pops?
The best way to fix a nail pop is to secure the drywall properly before repairing the surface. Remove or address the loose fastener, install a suitable drywall screw into the framing if needed, then cover the repair with joint compound. After it dries, sand it smooth, apply primer, and repaint the area. Simply covering the pop without securing the drywall may allow it to return.
What do nail pops in drywall indicate?
Nail pops usually indicate that a drywall fastener or the materials around it have moved. Common causes include natural wood movement, improper installation, loose fasteners, building movement, moisture changes, and normal aging. A few isolated pops are often harmless, but repeated or widespread pops can indicate that the underlying cause should be investigated.
Can I just hammer in nail pops?
You can sometimes hammer a protruding drywall nail back into place, but this is usually not the best long-term repair. A loose fastener may move again and cause another pop. A more reliable repair is to secure the drywall to the framing with an appropriate fastener, then fill, sand, prime, and paint the damaged area. Avoid hammering aggressively because it can damage the drywall surface.
How much does it cost to fix nail pops in drywall?
The cost depends on how many nail pops need repair, the size of the damaged area, the condition of the drywall, and whether you do the work yourself or hire a professional. A few small nail pops can often be repaired as a low-cost DIY project using joint compound, sandpaper, primer, paint, and drywall screws. Professional costs can be higher because you may pay for labor, minimum service charges, painting, or investigation of an underlying moisture or building problem. For an accurate price, get a local quote based on the number and condition of the affected areas.
Editorial & DIY Safety Note
This guide is intended for general educational and DIY home-improvement purposes, not as a substitute for an on-site inspection. Always follow the instructions and safety guidance provided with your tools, drywall materials, joint compound, primers, and paints.
If a drywall nail pop is associated with active water damage, substantial cracking, sagging, electrical or plumbing concerns, or other signs of a potentially serious building problem, stop the cosmetic repair and seek appropriate professional advice.
Sources & References
This guide was informed by established drywall installation and repair guidance from recognized industry organizations and manufacturers.